

How to Set Up a Raspberry Pi Version 4
24th June, 2020
Version: Raspberry Pi Version 4.
Abstract
This documentation demonstrates how to set up a Raspberry Pi and install the appropriate software for it. For this, you will need a keyboard, a mouse, a USB C power supply, a micro SD card (preferably with at least 8GB), an adapter for micro SD to normal SD card, a micro HDMI cable, a stable network, and a computer. You’ll need a Windows, Linux PC (like the Raspberry Pi), or an Apple Mac computer.
-
Setting Up Raspberry Pi OS: Raspbian
1.1. Download SD Card Formatter tool7
Install the SD Card Formatter tool from the SD Card Association website. Using an adapter, insert the micro SD card to your device and launch the Formatter tool.
1.2. Format the MicroSD
To format the microSD card, use the “Quick Format” option and click “Format”. After it is complete, it is now ready for use in the Raspberry Pi. Do not remove the card from your device yet.
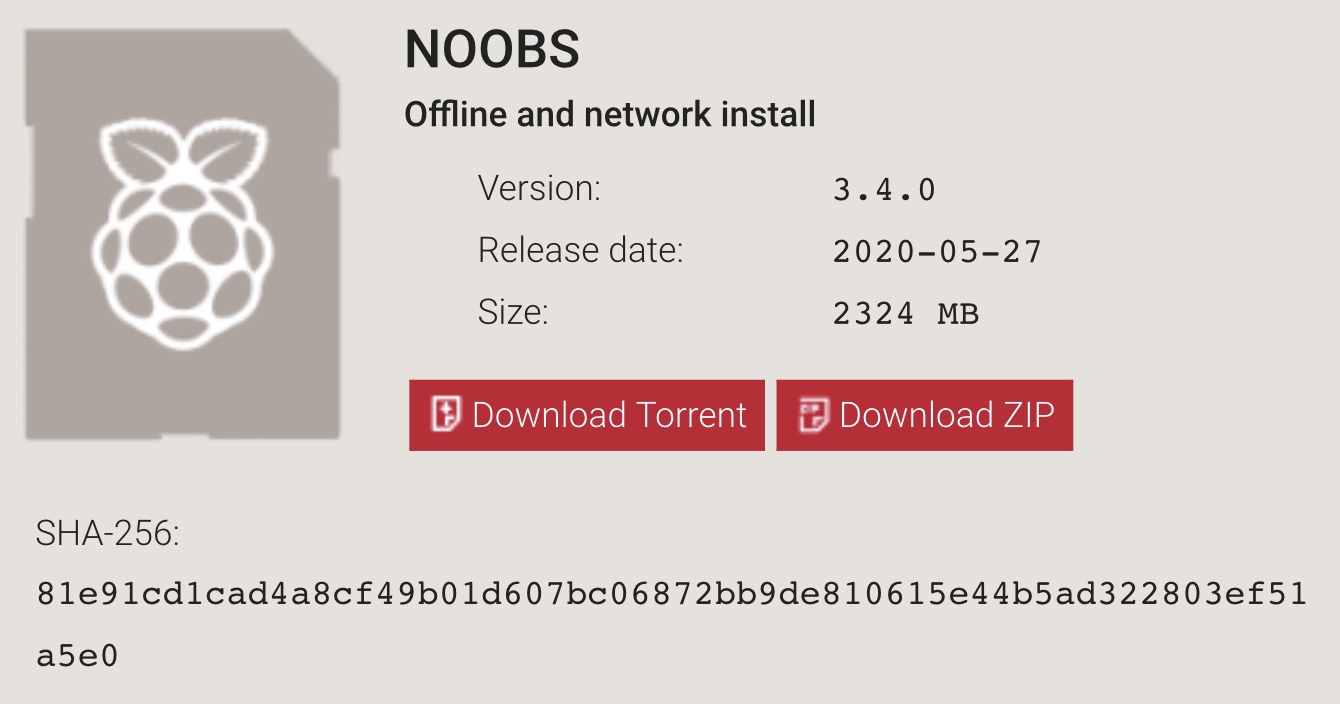
1.3. Downloading NOOBS
NOOBS is a software that will allow you to install Raspbian OS on your microSD card. Download NOOBS from the official Raspberry Pi website. Select “Download ZIP” under “NOOBS - offline and network install”.
Open the zip file after it finishes downloading, to launch and uncompress the folders. Copy everything from the NOOBS zip file to the micro SD card. Eject the card after it is done transferring.
Note: Copy the files inside the NOOBS folder, NOT the NOOBS folder itself.
-
Connecting the Raspberry Pi v4 to your device
2.1. Raspberry Pi v4.
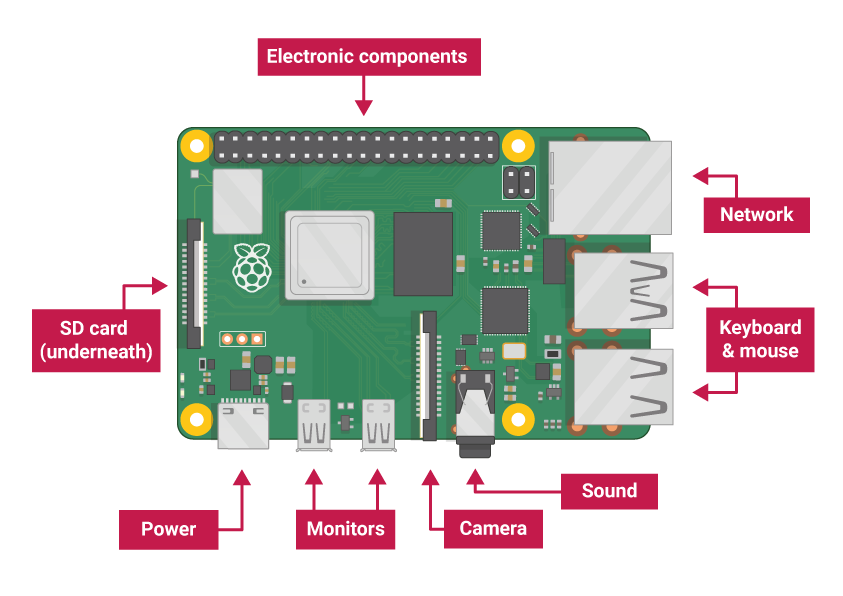
2.2. Inserting SD Card
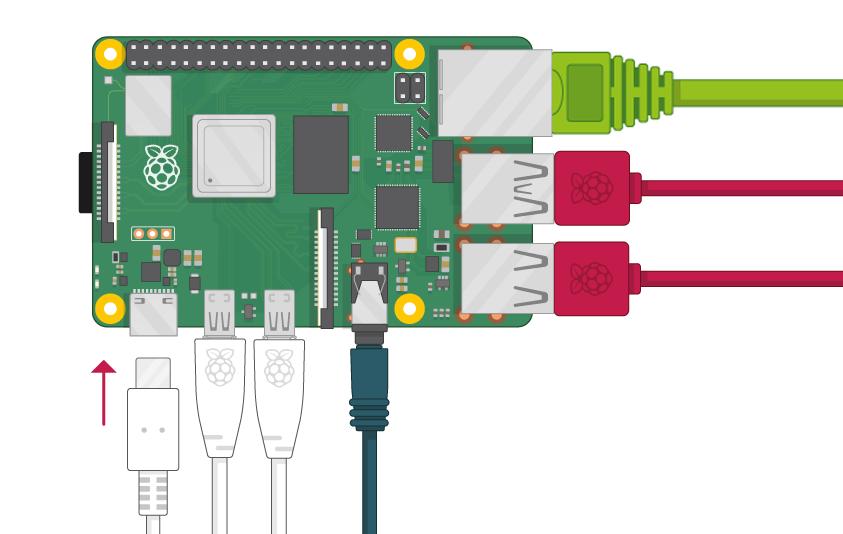
Insert the micro SD card that you have just installed the software on, into the SD card slot underneath the Raspberry Pi on the left.
2.3. Network
If you have a lan cable with a stable network, connect it to the network slot on the top right of the Raspberry Pi. Skip this step if you do not have a lan cable. Wifi can be used instead.
2.4. Mouse and Keyboard
Connect the mouse and keyboard into the second and third slot from the top on the right. There will be 4 USB slots, all of them will work the same.
2.5. Monitor
You will need a micro HDMI cable or an adapter from normal HDMI to a micro HDMI to connect to the Raspberry Pi. Insert the cable into either the second or third slot from the left and the other end to an available monitor.
2.6. Power Cable
If a power cable is provided with the raspberry pi, connect it to the left bottom slot and the other end to an outlet. If no power cable is provided, any power source (at least a 5-volt, 3-amp power adapter) that has a USB C end will be acceptable.
-
Setting Up the Raspberry Pi
3.1. Powering the Raspberry Pi Up
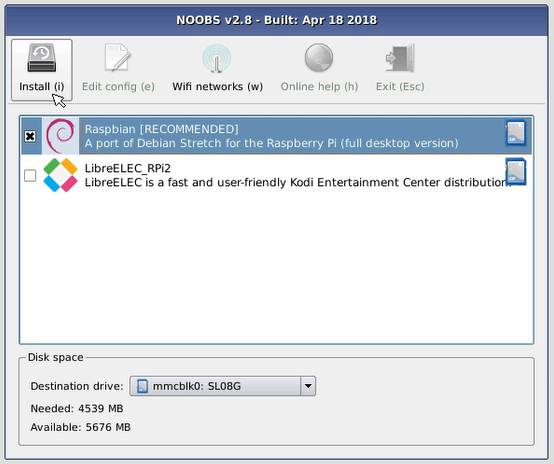
After plugging in everything, the screen should pop up after a few seconds. A window showing the NOOB installer will appear and there will be a choice of operating systems. Select the first option, which is the Raspbian, by ticking it and click “Install (i)” to start downloading. This will take some time. After it has finished, the Raspberry Pi will prompt you to click OK and it will reboot then launch Raspbian OS.

3.2. Welcome Page
After it has rebooted itself, you will see a welcome screen. Click “Next” and it will ask you to select your preferred language, create a login password and choose your wifi network. Once you see the “Update Software” window, click “Next”. If there are any errors, you can select “Skip” and find updates manually, shown in the next step 3.3. Click “Restart” when setup is complete.

3.3. Updating Software Manually
On the fourth icon from the left of the top of the screen, open Terminal. Type in the following codes, one at a time and press enter after each line:
- sudo apt-get update
- sudo apt-get upgrade -y
If there are any updates, it will start running and updating. If there are no updates, you can exit the terminal.
3.4. Fail2ban
Install fail2ban by typing in the following codes in the terminal, one at a time and pressing enter after every code line:
- sudo apt-get install fail2ban
- sudo nano /etc/fail2ban/jail.local
- [ssh]
After typing in [ssh], a window should pop up in the terminal. Type in the following codes to set parameters for fail2ban:
- enabled = true
- port = ssh
- filter = sshd
- logpath = /var/log/auth.log
- bantime = 900
- banaction = iptables-allports
- maxretry = 2
After typing in all the codes, press “crtl + x” then “y” and press “Enter”. Type in “sudo service fail2ban” to restart.
You have completed setting up the Raspberry Pi 4. To shutdown, press the Raspberry icon on the top left, select “Shutdown”.